Creating an interactive classroom filled with experiential exercises became my passion. I wanted my students to remember everything I taught, and therefore, they needed to live it! They needed to see, hear, feel, taste, and even smell history!
And based on current research, including current pleas by occupational therapists like this one, we need to have our kids up, moving, and engaged in ways far outside of the textbook or the device.
Tips for Creating Experiential Exercises
- Do NOT warn students or explain the exercise before they have the experience. This ruins the effect and the impact of the lesson. While there are a few exceptions to this rule (and I will address one below with the WWI Activity), the elements of surprise and confusion can play a key role is the activity’s implementation.
- Do NOT have students take notes during the activity. Save the “content” for afterward to keep the lesson as real as possible. Make it as real as possible and do not break your character.
- DO address as many senses as possible with your activity. Make it loud, make it hot, make it smell awful. These elements will make it so much more memorable for your students!
- DO go all out to make it as authentic as possible. At the same time, make sure that you address the fact that they can never truly walk in the shoes of those they are learning about and that respect should be given with that understanding.
- DO work to make students uncomfortable. We learn the most in our lives when we are at a place of discomfort. Make that reality for your students.
- Do NOT ever do an experiential exercise where the activity disrespects or demeans the historic event. While we can experience a generic trench moment from WWI, we cannot begin to experience even a single second of what it was like for those in the Holocaust. Do not even go there! Ever!
- Do ALWAYS debrief! This is the most important part! You will want to make sure students understand the relevancy of the exercise and the components of the exercise that may have caused confusion.
Suggestions for Bringing in the Lesson
- Debrief immediately after the activity. Never wait for the next day to discuss the activity. Debunk student misunderstandings and be sure to bring everyone back to reality.
- Add in the content AFTER the activity. I usually did my experiential exercises on the first day of the unit so students had zero background on the topic. This opened them up to learn with a new appreciation of the event.
- Refer to the activity in your lessons that follow. Making connections will keep the activity real and relevant for them, and will help them to better process new ideas and content.
- Make the connections between then and now OFTEN! Use T-Charts or other graphic organizers to help students categorize information and make the important connections.
- Use the activity experience as your assessment prompt starter. Take students back to that moment to help them recall all of the content you have covered since the experience.
Ideas for Experiential Exercises
- The Impact of the Printing Press – My students made greeting cards (that we sent to a nursing home afterwards) first by drawing each letter in a calligraphy format and then again with rubber stamps of individual letters. I was absolutely adamant that there must be perfection and threw many onto the floor when there was the slightest imperfection. I also stressed the time and the number of cards we needed to complete in the short amount of time.
- Drawing Like Michelangelo – This one has long been a classroom favorite for World History teachers. You can make it as simple as having students lay under their desks to draw, or you can make it more elaborate by placing narrow boards across desks with a second board above to simulate the ceiling to elevate students so they can feel the instability and the challenge of working on their back and attempt to create perfection!
- Civil Rights Discrimination – This is a very sensitive one to implement and you must know your students well. You can still find video footage of the Oprah Blue Eye/Brown Eye show to use as debriefing, and then you can discuss the difference between then (1990s) and now. I did this one by giving my students a quiz that I had copied in different formats. Some were very clear and easy to read, while others were torn, missing parts, or blurred. I also distributed pencils with a scantron, but some were very short, had broken led, or had no eraser. I stressed that this assessment would be worth an astronomical amount of points and then demanded absolute silence. When the segregated students attempted to complain, I silenced them (angrily), even making comments about their inability to learn or a lack of expectation for them “anyway” with great great emphasis. Some students would get angry and others would just give up. Be prepared for this (and always prepare your administration for any activity)! And then break the activity before it comes to the brink. Debrief immediately and be sure your students understand you were only performing a role to make the point of what was experienced in the past (and still today) by some populations.
- The Assembly Line – Set up your classroom into an assembly line with a “very important task” for students to complete accurately in a “very quick” manner! I changed this up each year, but most often we packed boxes to send to troops or to a natural disaster location. Students had to fold the boxes, tape the bottoms, pack the items in correctly, tape the tops, write the return address, and label the types of items included. I upped the game by turning up the heat (or making it very cold) and turning on machinery noise (I told my students it was the music I liked working with) that was almost deafening. I also yelled for students to work faster and threw unacceptable work to the ground. With a grade attached to their work completion, students were more stressed about completing the goals, and I played the role of demanding factory foreman. A comparison variation on this is to set up two factories: one working like an assembly line, and another where each student must complete all jobs to complete the task.
- Building the Pyramids – Starting your Egyptian Unit with this activity helps students grasp the challenge faced by those at the time to build the great Pyramids. My students were told I had to clean out our Social Studies Department room so the English Department could take over the space. They had to box up all of the books, move the boxes to the hall, and stack the boxes according to the demands of our custodian (who played a role for me). We did not praise or coddle the students in any way, and actually rushed them and threatened them with consequences for not working the way we directed. My admins would even participate by coming in and ordering things to be rearranged. Luckily, I had multiple classes, so the next class would do the reverse to put everything back to order!
- Breakfast for Everyone! – This was usually the first activity I did with my students at the beginning of the year. All of my U.S. students were invited for a 7AM breakfast in my room. I made or brought all of the breakfast goodies, including eggs, bacon, sausage, donuts, fruits, biscuits and gravy… The entire hallway smelled incredible as students came into the building. One of my student aides would pass out numbers as students arrived. (1s to the first group, 2s to the next [and smallest group]… to 4 or more depending on how you want to sort the groups). Once cooking the breakfast was “finished” and everyone was good and hungry, I ignored Group 1 and called Group 2 to pick all they wanted to eat. I then offered group 3 scraps from my cooking (cut off edges of things, burnt items…), I gave group 4 some options, but told them to hurry and move out of the way so Group 2 could come back for more. When Group 2 told me they were done, I immediately pulled over the trash can and threw away EVERYTHING left! This led to gasps and anger from some who had not eaten yet or only had scraps. Then it was bell time, and students had to go to class (this time without explanation). During each class period, I would debrief and explain. By this time, most students were hungry and feeling those pangs. Where’s the history lesson? Group 1 were the Native Americas. Group 2 were the European settlers. Group 3 the slaves. Group 4 were newer immigrants. And then there is the added lesson on poverty and waste. I usually followed this one up with a fundraiser for a poverty or hunger-supporting agency or a can food drive for our local food bank.
- And then there was the WWI Trench Warfare Activity! – This was my biggest event each year. And while some do this as a video watching activity while students sit in the floor between their desks, that just wasn’t enough to make the impact I wanted to make on my students. So… here is the step by step:

WWI Trench Warfare EXTREME Experiential Exercise
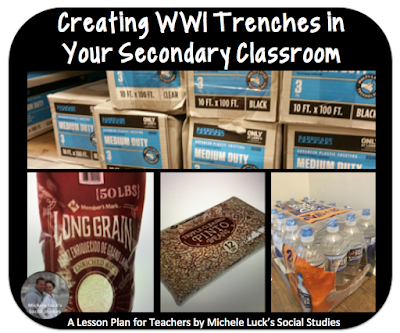
- Go a month ahead of time to Lowes/Home Depot and Walmart to speak with a manager and ask for an activity sponsorship forms. If you do not get these items sponsored, be prepared for up to $400 out of pocket for this single activity! I paid that the first 2 years before I realized I had the option of getting assistance!
- Buy enough Black Plastic Sheeting (4-6 Mil) to cover the area you wish to transform. I usually bought 200 Ft. for my classroom. You may also want to purchase strong clamps to attack and hold the plastic.
- At Sams, Walmart, or your local grocery, buy 25-50 lb. bags of rice and beans, and also the sports bottles of water.
- In the days leading up to the activity, tell your students you will be simulating WWI trench warfare. [Play this up!] Tell them to wear old clothes that can be torn, destroyed, or stained. Tell them they may want to have their hair pulled back (military style) for safety.
- Send home a permission to participate letter (unless you have already gained this permission in your class syllabus, which I did).
- Print out dog tags for each students onto card stock, cut out, and laminate.
- Enlist older, mature students (or other faculty) to help with the activity. Meet ahead of time to go over roles and placement. I did a full rehearsal the afternoon before and the same students helped me to set up my room at the same time. {Reward them with pizza!}
- Put away everything in your classroom you do not want to be destroyed! Seal off drawers and cover everything, including all windows with the black plastic.
- Move student desks to create a long, winding trench from the door to the furthest corner of your classroom. Cover with the farm plastic, creating a valley with the plastic. Students will crawl through this valley. Attach the plastic to hold it in place.
- Place the plastic over your doorway from top to bottom and cut strips at the bottom for students to crawl through when the activity begins.
- Have All Quiet on the Western Front (I like the old version with on cue to start with this battle scene. Turn the volume all the way up.
- Turn up (or down) the temperature in your classroom to an uncomfortable level. I usually turned UP the heat!
- Have your helpers inside the room ahead of time, so their eyes can adjust to the darkness.
- Meet with your class in the hallway. Distribute the dog tags and assign battalion commanders to lead their troops. Explain the importance of remaining alert to dangers and of preventing panic.
- Have one helper start the movie sound (NO LIGHT from video) as students begin entering the classroom trench.
- As the first students begin feeling their way through, the helpers will blow a whistle and begin the “attack” where they toss (warn not to throw too hard) the rice, beans, and water.
- At designated turns, place a helper under the plastic with a can of hairspray. As students approach, they should yell out “gas attack” as they begin to spray the can.
- Urge students to move into the trench quickly and to keep moving. Guide your commanders to keep moving troops forward.
- Continue the attack through the 10 minutes of the battle scene.
- Debrief with students still sitting in the trenches, but pull down the plastic from the door and windows for lighting.
- CLEAN UP! My entire class participated in the clean up (and sometimes helped me reset for the next class).
- Stress the importance of secrecy! My students that participated would help build up the anticipation and anxiety for the activity with my new classes each year. They never shared the secrets of the “mud, bullets, and rain” that poured over them and they always built it up as something everyone HAD TO DO!
- Follow up with the lesson! In my TpT Store, I have a great summary lesson that can also be done as a much tamer version if you aren’t up for this classroom destroying adventure!
Less Experience/More “Fun” Activities
These lessons do not always have to be extreme or on sad topics. Some can be fun!
- Try a Beatnik Poetry Reading with beads hung from the doors and windows, psychedelic music in the background and incense burning as you (and students) snap and read your favorite literature and poetry of the time.
- Take students back to the Roaring 20s by teaching them the Charleston and meeting up at a Speakeasy to talk in 20s lingo as you sip on rootbeers.
- Take a Riverboat Tour as you travel along the Nile to investigate the great structures of hte Egyptian Kingdoms.
- Hold a Hula Hoop Contest as you learn about the Youth Age of the 1950s and 60s. Bring in a soda jerk to serve Pepsi floats with rock-n-roll playing in the background.
- Create an Archeology Dig in your classroom with these simple how-to directions or watch this free video on building a site you can use over and over to dig up history with your students!
In the end, you have to push the boundaries and push their minds to think about controversial or hard topics in your classroom and beyond. Place them in positions where they need to make decisions about speaking out or behaving in an appropriate manner to response to events that involve them (or those around them).
And don’t just teach these lessons so that students will remember them, and you, as the fun stuff they did in school. Do them so they remember! So they remember history and the lessons it teaches us about the way we should live here and now.

Happy Teaching!